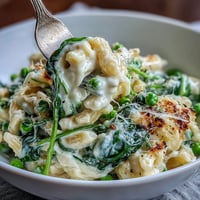
Save
Save The smell hit me first—yeast and butter mingling in the air, pulling me toward the kitchen window where my grandmother stood twisting dough into perfect U shapes. I watched her dip each pretzel into the bubbling baking soda bath, the steam fogging up her glasses as she explained this secret step was what made them taste like they came from a German bakery, not our suburban kitchen. That afternoon, flour covered every surface, my hands were sticky with dough, and I learned that pretzels are about as forgiving as they are delicious. Now whenever I make them, I remember her laughter when my first pretzel emerged looking more like a tangled knot than the classic twist.
Last winter during a snowstorm, my roommate and I spent an entire afternoon perfecting our pretzel technique. We made a double batch, experimenting with different twists and turns, and ended up with the most uneven but delicious assortment anyone had ever seen. Our friends came over shivering from the cold, and within minutes, the kitchen was filled with people grabbing warm pretzels off the cooling rack. That night proved that imperfection tastes just as good when shared with good company.
Ingredients
- Bread flour: The higher protein content creates that characteristic chewy texture regular flour cannot achieve
- Active dry yeast: Use water that feels like bath temperature to activate it without killing it
- Baking soda: This alkaline bath is nonnegotiable—it reacts with the dough to create the pretzel's signature crust and flavor
- Coarse pretzel salt: The large crystals provide the perfect salty crunch against the soft interior
- Egg wash: Gives the pretzels their beautiful glossy golden finish
Tired of Takeout? 🥡
Get 10 meals you can make faster than delivery arrives. Seriously.
One email. No spam. Unsubscribe anytime.
Instructions
- Wake up the yeast:
- Stir your warm water, sugar, and yeast together in a large bowl and wait five minutes until you see a foamy layer form on top—this tells you the yeast is alive and ready to work.
- Build the dough:
- Add your melted butter and salt to the yeast mixture, then gradually incorporate the flour one cup at a time until you have a shaggy mass that pulls away from the sides of the bowl.
- Knead until smooth:
- Turn the dough onto a floured surface and work it with your hands for 5 to 7 minutes until it transforms from sticky and rough into something smooth, elastic, and almost alive beneath your palms.
- Let it rise:
- Place your dough in a lightly oiled bowl, cover it with a clean towel, and find a warm corner of your kitchen where it can rest undisturbed for about an hour until it has doubled in size.
- Shape your pretzels:
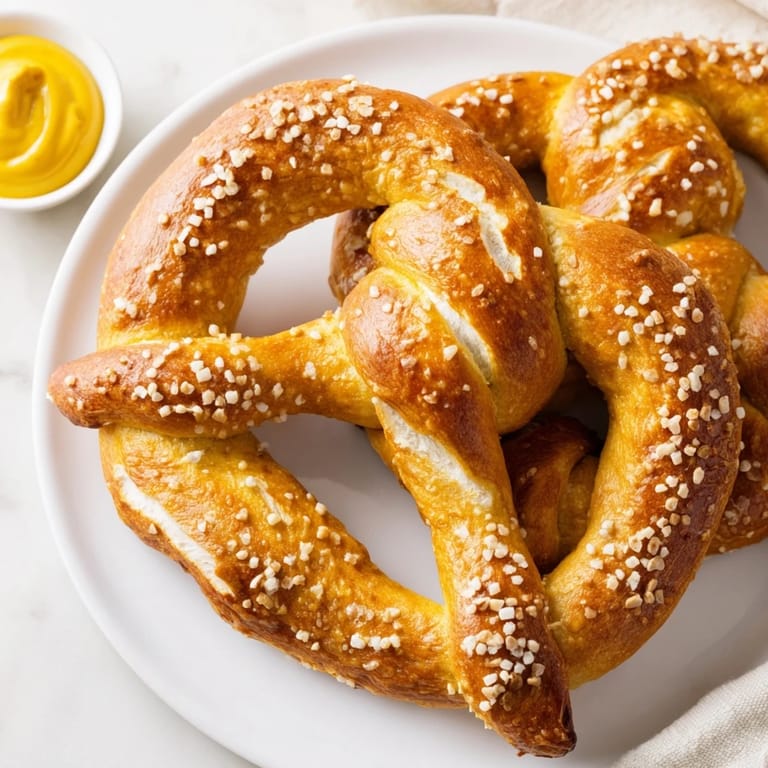
- Divide the dough into 8 equal pieces and roll each into a long rope, then form that classic pretzel shape by making a U, twisting the ends twice, and pressing them down into the curve.
- The baking soda bath:
- Bring 10 cups of water to a rolling boil with the baking soda, then carefully lower each pretzel into the bubbling water for exactly 30 seconds before transferring it to a parchment lined baking sheet.
- Finish and bake:
- Brush each pretzel with egg wash, sprinkle generously with coarse salt, and bake at 450 degrees for 12 to 15 minutes until they are deeply golden and filling your kitchen with an incredible aroma.
 Save
Save My daughter asked if we could make pretzels for her class party, and I hesitated—eight kids worth of handmade pretzels seemed ambitious. But something about the way her eyes lit up at the challenge made me say yes. We spent the morning twisting dough together, her small hands learning the rhythm of the fold and twist, and when she walked into her classroom carrying that box of warm pretzels, she looked so proud I knew this recipe had become something more than just food.
Getting That Classic Shape
The pretzel twist takes practice, and I have certainly made my share of pretzels that looked more like abstract art than the classic shape. Start by rolling your dough into an even rope—thicker in the middle, tapered at the ends. Form that U shape, cross the ends over each other twice, then fold them down and press firmly into the bottom curve. Your first attempts might be lopsided, but they will still taste incredible.
Making Them Sweet
My sweet tooth prefers the cinnamon sugar variation, and it could not be easier. Skip the salt topping entirely, and instead brush your baked pretzels generously with melted butter while they are still warm. Immediately sprinkle them with a mixture of cinnamon and sugar—the butter helps it stick and creates this incredible crunchy, sweet coating that makes them practically disappear from the cooling rack.
Serving Suggestions
Classic yellow mustard is the traditional pairing, but do not be afraid to experiment. A sharp cheddar cheese sauce transforms these into an indulgent appetizer, while honey mustard adds sweetness that complements the salty crust. For a lighter option, try dipping them in hummus or herbed Greek yogurt—something about the warm, salty pretzel against cool creamy dip is absolutely perfect.
- Mix everything mustard with a touch of honey for dipping
- Try garlic butter and parmesan as a savory alternative to salt
- These are best enjoyed within an hour of baking
 Save
Save There is something deeply satisfying about pulling a tray of golden pretzels from your own oven, the smell filling your kitchen, knowing you created something so delicious with your own hands. Share them warm, watch people's faces light up, and know you have mastered a recipe that will bring joy for years to come.
Questions & Answers
- → Why do pretzels need a baking soda bath?
The baking soda bath creates that signature pretzel flavor and deep golden-brown color. The alkaline solution gelatinizes the dough's surface, producing a chewy, glossy crust that's distinctive to pretzels. This traditional step mimics the lye dip used in commercial bakeries and is essential for authentic results.
- → Can I make these pretzels without the egg wash?
Yes, you can skip the egg wash if preferred. Brush with melted butter instead for a softer crust, or simply dip the boiled dough directly into coarse salt. The egg wash provides the best shine and helps salt adhere, but pretzels will still bake beautifully without it.
- → How do I store leftover pretzels?
Store cooled pretzels in an airtight container at room temperature for up to 2 days. For longer storage, freeze individually wrapped pretzels for up to 3 months. Reheat frozen or refrigerated pretzels in a 350°F oven for 5-7 minutes to restore their chewy texture and warmth.
- → What's the trick to getting the classic pretzel shape?
Roll each dough piece into an even 20-22 inch rope. Form a U shape, cross the ends twice near the base, then fold the twisted ends down and press them firmly into the curved bottom. If shaping proves difficult, simply tie the rope into a knot or leave them as traditional sticks.
- → Can I use whole wheat or other flour varieties?
Bread flour works best due to its higher protein content, which creates the characteristic chew. You can substitute up to half the bread flour with whole wheat, though the texture will be denser. All-purpose flour will produce softer results. For whole grain versions, expect a slightly different mouthfeel.
- → Why did my pretzels turn out too dark or bitter?
Over-boiling in the baking soda bath can cause bitterness. Limit each dip to exactly 30 seconds. If pretzels brown too quickly, reduce oven temperature by 25 degrees and extend baking time slightly. The deep mahogany color is desirable, but they shouldn't taste burnt or metallic.